How To Make A Gallery Wall
A practical step-by-step guide to how to make a gallery wall, including preparation, instructions, common issues, tips, and next steps.
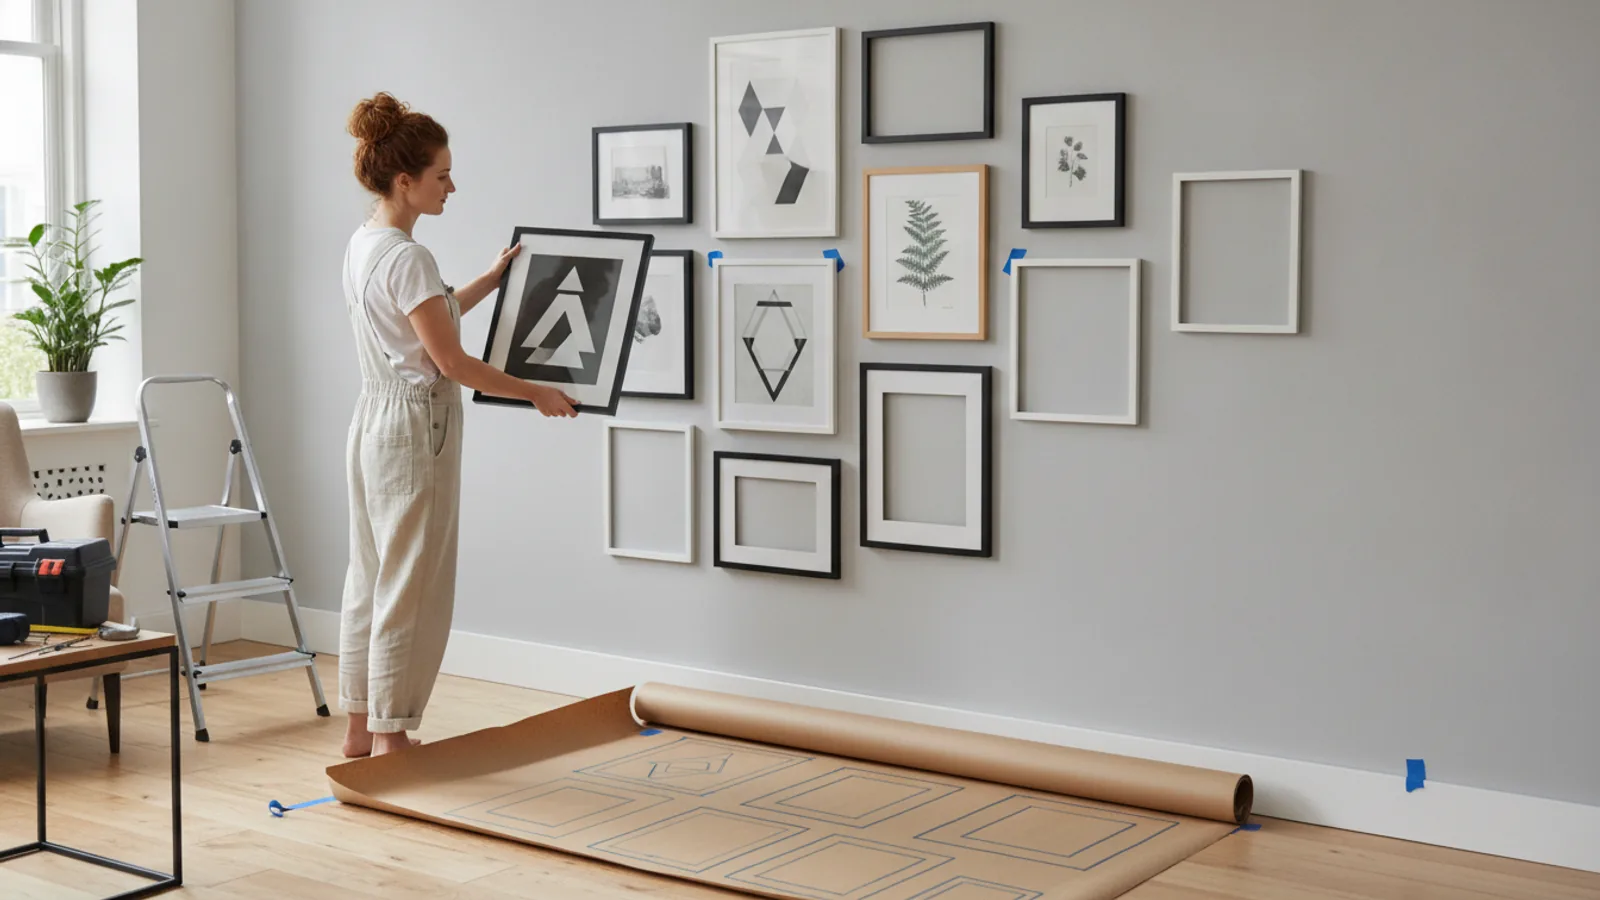
How To Make A Gallery Wall
This guide explains how to approach how to make a gallery wall, including the preparation, practical steps, common mistakes, and final checks that help you finish with confidence.
Before You Start
Before you begin the exciting process of designing and installing your gallery wall, a little preparation goes a long way. Gathering all your materials and understanding potential challenges will ensure a smoother, more enjoyable experience and a professional-looking result. Taking the time for these initial checks can save you frustration and effort later on.
Step-by-Step Instructions
Quick Reference
Common Problems When You Make A Gallery Wall
Even with careful planning, sometimes things don't go quite as expected. Knowing the most common issues and how to fix them can save you a lot of headache and ensure your gallery wall looks its best.
Uneven Spacing Between Frames
This is a very common issue, often caused by eyeballing distances rather than measuring. It can make a gallery wall look messy and unintentional, even if the individual frames are straight.
Crooked or Tilted Frames
Frames that refuse to hang straight are incredibly frustrating and can make the entire wall feel off-kilter. This usually happens if the hanging point was marked inaccurately or if the frame's hanging wire allows too much movement.
Wall Damage During Installation
Unintended damage like crumbling plaster, large holes, or cracks around nails can occur, especially in older homes or with delicate wall materials. This is often due to using the wrong type of hardware or drilling without proper support.
Layout Looks Good on Floor, Bad on Wall
Sometimes, what looks perfect on a flat surface doesn't translate well to a vertical wall, appearing too cramped, sparse, or unbalanced when viewed from a distance.
Overwhelmed by Too Many Pieces or Clutter
A gallery wall should feel curated, not chaotic. Too many items, or items that clash severely, can make the wall feel busy and overwhelming rather than stylish.
Advanced Tips for How To Make A Gallery Wall
Once you’ve mastered the basics of creating a stunning gallery wall, there are many ways to elevate your design and add even more personality and flair. These advanced tips can help you push your creativity and make your gallery wall truly unique.
Incorporate Dimensional Objects
Don’t limit your gallery wall to just framed art and photos. Integrate three-dimensional objects to add depth, texture, and unexpected interest. Think about small shelves holding tiny plants or sculptures, decorative plates, wall sconces, or even small mirrors with interesting frames. Mixing flat and dimensional pieces creates a dynamic visual experience and adds a layer of sophistication to your display.
Use a Grid for Modern Minimalism
While many gallery walls embrace an eclectic, organic layout, a precise grid arrangement offers a sleek, modern, and minimalist aesthetic. For this, all your frames should ideally be the same size and style. Use a laser level and careful measurements to ensure perfectly even spacing (e.g., exactly 5 cm between each frame horizontally and vertically). This creates a very intentional and calming visual effect, making a strong statement with clean lines.
Extend Beyond the Wall
A truly immersive gallery wall can cleverly interact with nearby furniture. Instead of stopping abruptly above a sofa or console table, consider letting a few frames "float" slightly above the furniture, or even incorporating a decorative object *on* the furniture as part of the visual flow. For example, a tall decorative vase on a console table could act as a visual anchor for a small grouping of frames placed slightly above and to its side, blurring the lines between wall decor and room styling.
Create a Thematic Story
Go beyond just a general theme like "family photos." Try to tell a more specific story with your chosen pieces. This could be a timeline of a journey, a collection of art from a particular region, or pieces that represent a specific hobby or passion. A strong narrative makes your gallery wall more engaging and meaningful to you and your guests, inviting closer inspection and conversation.
Play with Scale and Proportion
While consistent spacing is often recommended, intentionally playing with varied scale and proportion can create a visually exciting and dynamic gallery wall. This means carefully placing very large frames next to very small ones, or mixing portraits with vast landscapes. The key is still balance – ensure that the overall arrangement doesn't feel lopsided, even with dramatic size differences. This technique works best when there's an overarching element that ties the disparate sizes together, such as a uniform colour scheme or subject matter.
Consider the Room's Function
Tailor your gallery wall to the specific room it's in. In a dining room, perhaps art related to food, travel, or conversation. In a bedroom, serene landscapes or calming abstract pieces. For a child's room, vibrant, playful art at their eye level. Thinking about the room's purpose will help you choose content and a style that enhances, rather than clashes with, the space's intended mood.
How To Make A Gallery Wall FAQ
Here are answers to some frequently asked questions about creating the perfect gallery wall.
How far apart should frames be on a gallery wall?
Generally, a consistent spacing of 5-8 cm (2-3 inches) between frames works well for most gallery walls, providing enough visual separation without looking too sparse. However, this can be adjusted based on your desired look: closer spacing (e.g., 2-3 cm) creates a more clustered, eclectic feel, while wider spacing (e.g., 10-15 cm) gives each piece more breathing room and a more minimalist vibe. The key is consistency within your chosen style.
What if I don't want to drill holes in my wall?
If you're renting or simply prefer not to drill, strong adhesive picture hanging strips (such as Command Strips in the UK) are an excellent alternative. These strips stick to the wall and the frame, allowing for easy removal without damage. Always ensure you choose strips rated for the weight of your frames, and follow the manufacturer's instructions carefully for proper adhesion and removal.
How do I make a gallery wall look cohesive with different frames?
There are several ways to achieve cohesion even with mixed frames. You can paint all your frames a single, unifying colour (e.g., matte black, crisp white, or a metallic). Alternatively, use a consistent matt board colour for all your prints and photos, which creates a visual border that ties everything together. Another approach is to stick to a specific colour palette or theme for the artwork itself, allowing the diverse frames to add texture and interest rather than discord.
Can I include a television in a gallery wall?
Yes, absolutely! Incorporating a television into a gallery wall can be a very effective way to make it blend into the decor rather than stand out as a black rectangle. Treat the television as the largest, central 'piece' of your art collection. Arrange frames around it, ensuring there's enough space for comfortable viewing and to prevent the area from looking too cluttered. Consider framing the TV with a thin, simple frame to help it integrate even more seamlessly.
What's the best way to get frames perfectly level?
A good spirit level is your best friend for this. Use it extensively during the template stage and again when hanging each actual frame. For fine-tuning, some picture hangers allow for slight adjustments after hanging. If a frame consistently tilts, small, clear adhesive bumpers on the bottom corners of the frame can help it grip the wall and prevent it from shifting. A laser level can also provide a perfectly straight guideline across the wall, making it easier to align multiple frames.
How do I make my gallery wall feel balanced, even with different sized frames?
Visual balance is key. Start with your largest or most dominant piece as an anchor. Then, distribute the "visual weight" of the other pieces around it. Group smaller frames together to create a larger visual block. Avoid putting all your heavy or dark pieces on one side. Imagine a seesaw; you want to distribute the items so that neither side feels like it would tip over. Taking photos of your floor layout helps you spot imbalances before committing to the wall.
Final Checklist for How To Make A Gallery Wall
Use this checklist to ensure you've covered all the essential steps for creating a beautiful and perfectly installed gallery wall.